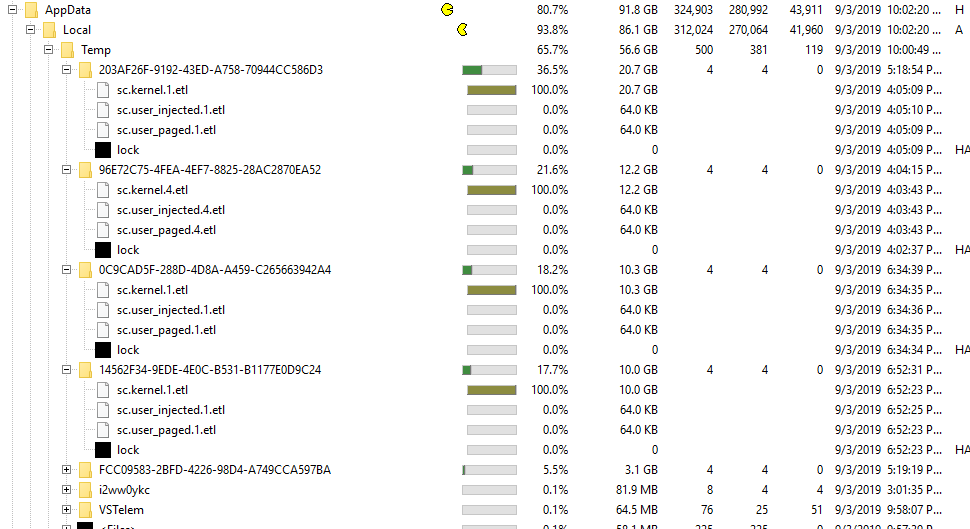
I keep having to delete these folders and files because they keep appearing and using up all my storage space.

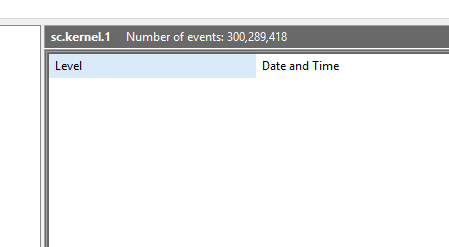
I tried looking at the Event Viewer, but nothing was displayed.

I also tried converting the log, but still couldn’t find any information and the log just got larger.

What could be causing this issue?
3 Answers
Possible Causes of Huge Kernel Dump Files
Kernel dump files are created when a system encounters a critical error, such as a Blue Screen of Death (BSOD). They contain information about the state of the system at the time of the crash, including memory dumps, driver data, and other system information. These files are important for diagnosing and troubleshooting system crashes, but they can also take up a lot of disk space, especially if they are not properly managed. In this blog post, we will explore some possible causes of huge kernel dump files and how to address them.
Insufficient Disk Space
One of the most common reasons for huge kernel dump files is insufficient disk space. When a system encounters a critical error, it tries to create a kernel dump file in a temporary location on the system drive. If there is not enough free space on the system drive, the dump file can quickly grow in size, consuming all available disk space. This can cause the system to become unstable or even crash.
To address this issue, you should regularly monitor your disk space usage and free up space as needed. You can use built-in tools like Disk Cleanup or third-party software to remove temporary files, unused applications, and other unnecessary data. You can also move your kernel dump files to a different location with more available space. To do this, open the System Properties dialog box, click on the Advanced tab, and then click on the Settings button under Startup and Recovery. From there, you can specify a different location for your dump files.
Incorrect Dump File Settings
Another possible cause of huge kernel dump files is incorrect dump file settings. By default, Windows is set to create a complete memory dump when a system crashes. This dump file contains the entire contents of the system’s memory at the time of the crash and can be very large, often exceeding 50GB or more. If you do not need this level of detail, you can change the dump file settings to create a smaller file, such as a kernel memory dump or a small memory dump.
To change the dump file settings, open the System Properties dialog box, click on the Advanced tab, and then click on the Settings button under Startup and Recovery. From there, you can choose the type of dump file you want to create and specify its size. Keep in mind that smaller dump files may not contain enough information to diagnose certain types of system crashes, so choose your settings carefully.
Driver Issues
Kernel dump files can also be caused by driver issues. When a system encounters a critical error, it may be due to a malfunctioning driver or hardware component. If the driver is not properly coded or configured, it can cause the system to crash and create a large kernel dump file.
To address this issue, you should update your drivers regularly to ensure that they are up-to-date and compatible with your system. You can use Windows Update to install the latest driver updates automatically, or you can download them manually from the manufacturer’s website. You can also use the Device Manager to check for driver issues and update them as needed. If you suspect that a specific driver is causing the issue, you can try disabling or uninstalling it to see if the problem goes away.
System Configuration Issues
Kernel dump files can also be caused by system configuration issues. If your system is configured incorrectly or has conflicting settings, it can cause the system to crash and create a large kernel dump file.
To address this issue, you should review your system configuration and ensure that all settings are correct and compatible with your hardware and software. You can use built-in tools like System Configuration or third-party software to diagnose and fix configuration issues. You can also try resetting your system to its default settings to see if that resolves the problem.
Malware or Virus Infection
Finally, kernel dump files can be caused by malware or virus infections. Malware can infect your system and cause it to crash or behave abnormally, resulting in large kernel dump files. In addition, some malware may specifically target kernel dump files to hide their presence or steal sensitive information.
To address this issue, you should regularly scan your system for malware and viruses using a reputable antivirus software. You should also keep your antivirus software up-to-date and enable real-time scanning to detect and remove threats as they arise. Additionally, you should avoid downloading or opening suspicious files or emails that may contain malware or viruses.
Conclusion
In conclusion, huge kernel dump files can be caused by a variety of factors, including insufficient disk space, incorrect dump file settings, driver issues, system configuration issues, and malware or virus infections. By understanding these possible causes and taking steps to address them, you can ensure that your system remains stable and secure. Regular maintenance and monitoring of your system can help prevent kernel dump files from becoming a problem and ensure that your system is running at its best.
There are a few possible causes for this issue:
- A kernel memory dump file is created when the operating system encounters a system error or crash, such as a blue screen of death. If your system is crashing frequently, this could explain the large kernel dump files.
- Another possibility is that there is a problem with the configuration of your system’s crash dump settings. By default, Windows is configured to create a small memory dump (64KB) when a crash occurs, but you can configure it to create a larger memory dump or a full dump. If the crash dump setting is set to create a full dump or a large memory dump, this could explain the large kernel dump files.
- It’s also possible that there is a problem with the hardware on your system, such as a faulty RAM module or hard drive. If this is the case, the large kernel dump files could be a symptom of the underlying issue.
To troubleshoot this issue, I would recommend the following steps:
- Check the Event Viewer for any error messages or warning messages that might give clues as to what is causing the system crashes.
- Check the crash dump settings to ensure that they are configured correctly. You can do this by opening the System Properties dialog (right-click on My Computer and select Properties), and then clicking on the Advanced tab and the Settings button under Startup and Recovery.
- If the problem persists, it might be worth running some hardware diagnostics to check for any issues with your system’s RAM or hard drive. You can use tools like MemTest86 or the Windows Memory Diagnostics tool to test your RAM, and tools like CHKDSK or S.M.A.R.T. to test your hard drive.
- If you are still having problems after trying these steps, it might be worth seeking help from a qualified technician or computer repair service. They will be able to diagnose the issue more thoroughly and provide you with a solution.
It turns out that the Visual Studio 2019 CPU and Memory diagnostic component was causing the issue. Once I turned this off, the large log files stopped being generated.
It sounds like you are experiencing an issue where certain folders and files are constantly appearing and using up storage space on your device. You mentioned that you tried accessing the Event Viewer and converting the log, but were unable to find any information about the cause of the issue. You also mentioned that the log files became even larger when you tried to convert them.
It seems that you were able to resolve the issue by turning off the Visual Studio 2019 CPU and Memory diagnostic component. This component is a tool that is used to help identify performance issues in Visual Studio. It is possible that this component was causing the issue by generating large log files.
If you continue to experience this issue or have any further questions, it may be helpful to seek additional assistance from a technical support specialist or to perform further troubleshooting on your device.