I recently set up Windows 10 on a VirtualBox virtual machine, with Ubuntu 18.04 as the host operating system. I’m interested in adjusting the size of the VM’s screen within the VirtualBox window to match the size of the host’s screen. Could you provide me with instructions on how to do so?
2 Answers
Introduction
VirtualBox is a popular virtualization software that allows users to run multiple operating systems on a single host machine. This can be useful for testing software, running legacy applications, or simply trying out a new operating system without having to install it on your physical hardware. However, when using VirtualBox, you may encounter issues with screen resolution, particularly when running a guest operating system within a window on your host machine. In this blog post, we will show you how to resize the screen of a VirtualBox VM running Windows 10 on an Ubuntu 18.04 host.
Step 1: Install VirtualBox Guest Additions
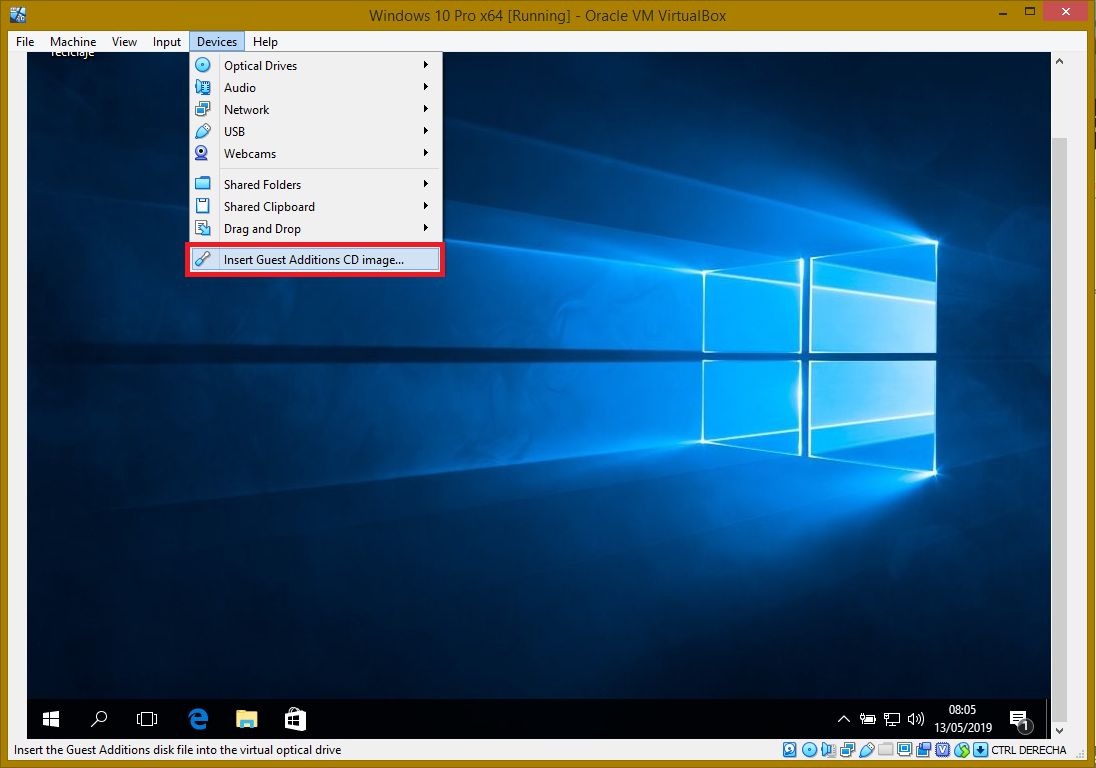
Before we can resize the screen of our VirtualBox VM, we need to install the VirtualBox Guest Additions. These are a set of drivers and utilities that improve the performance and functionality of the guest operating system. To install the Guest Additions, first start the VM and then click on the “Devices” menu in the VirtualBox window. From there, select “Insert Guest Additions CD Image”. This will mount a virtual CD containing the Guest Additions software within the guest operating system.
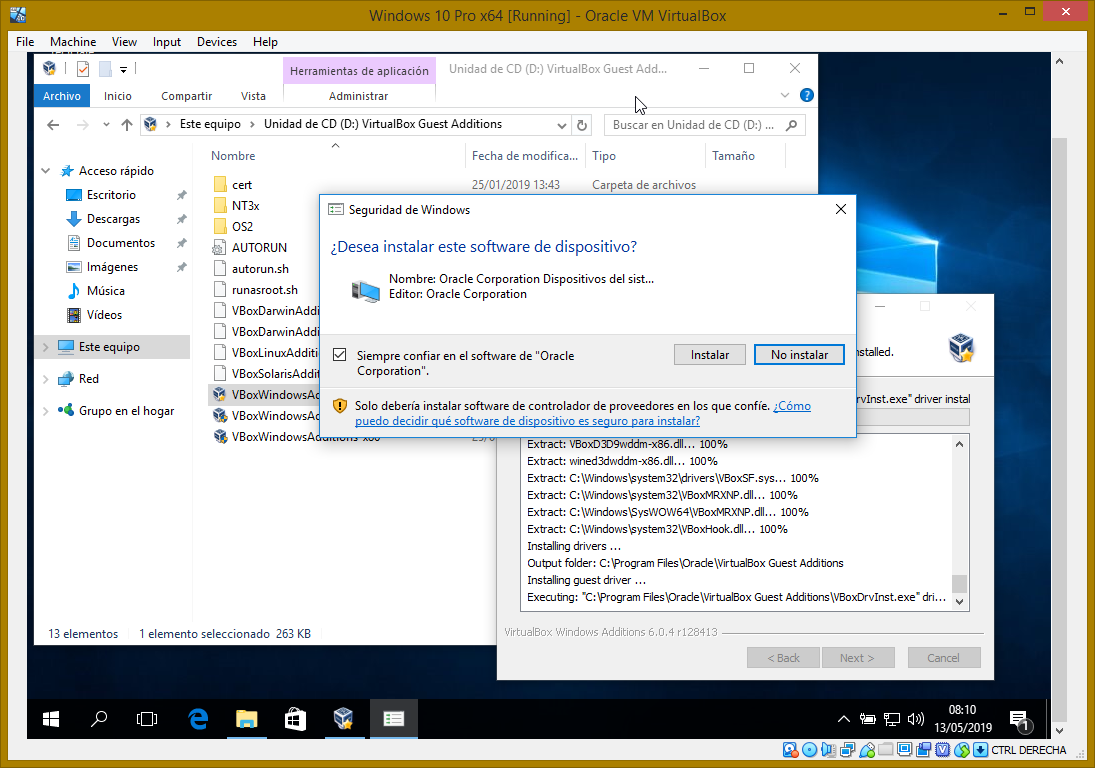
Next, open a command prompt within the guest operating system and navigate to the CD drive. Run the command “VBoxWindowsAdditions.exe” to launch the Guest Additions installer. Follow the on-screen instructions to complete the installation process. Once the installation is complete, restart the VM.
Step 2: Adjust VirtualBox Display Settings
With the Guest Additions installed, we can now adjust the display settings of our VirtualBox VM. Start the VM and then click on the “View” menu in the VirtualBox window. From there, select “Virtual Screen 1” and then choose a new resolution from the list of available options. You can also select “Auto Resize Guest Display” to automatically adjust the guest resolution to match the size of the VirtualBox window.
If you are running a version of VirtualBox earlier than 6.0, you may need to manually enable the “Extend Display” option. To do this, click on the “Settings” button in the VirtualBox window and then select the “Display” tab. Check the box next to “Enable 3D Acceleration” and then select “Remote Display” from the “Graphics Controller” dropdown. Finally, check the box next to “Enable Server” and set the “Server Port” to 3389.
Step 3: Adjust Windows Display Settings
Now that we have adjusted the VirtualBox display settings, we need to configure the display settings within the guest operating system. Start Windows 10 and then right-click on the desktop. Select “Display settings” from the context menu. From there, you can adjust the screen resolution and scaling settings to match the new resolution set in VirtualBox. You may need to experiment with different settings to find the best combination for your particular setup.
Step 4: Enable Seamless Mode (Optional)
If you want to further improve the integration between the host and guest operating systems, you can enable Seamless Mode. This allows you to run Windows applications directly on the Ubuntu desktop, without having to switch back and forth between the guest and host environments. To enable Seamless Mode, click on the “View” menu in the VirtualBox window and then select “Seamless Mode”. This will hide the Windows desktop and allow you to interact with Windows applications as if they were running natively on Ubuntu.
Step 5: Save Settings for Future Use
Once you have configured the display settings to your liking, you can save them for future use. Click on the “Machine” menu in the VirtualBox window and then select “Save State”. This will save the current state of the VM, including the display settings, so that you can easily resume your work at a later time.
Conclusion
In this blog post, we have shown you how to resize the screen of a VirtualBox VM running Windows 10 on an Ubuntu 18.04 host. By following these steps, you can improve the functionality and usability of your virtualized environment, making it easier to work with multiple operating systems on a single machine. Whether you are a developer, IT professional, or just a curious user, VirtualBox is a powerful tool that can help you get the most out of your hardware.
To utilize your virtual machine in full-screen mode with enhanced resolution, you must install Guest Additions. These act as drivers for your virtual machine, which provide improved graphics and support for advanced USB technologies (USB 2.0, USB 3.0).
Initially, you will need to obtain and install the Extension Pack, which allows you to use Guest Additions. The current version of the Extension Pack (v6.0.6 as of writing this response) can be downloaded from this location. In case you are using an older version of VirtualBox, you can select the appropriate version here.
Installation Steps
After starting your virtual machine, navigate to the Devices menu and select the “Insert Guest Additions CD Image…” option.

The virtual machine will recognize the CD image, and you can proceed to install the additions by clicking through the prompts (such as Next, Next, Next, Install…) and accepting the installation of the VirtualBox driver.

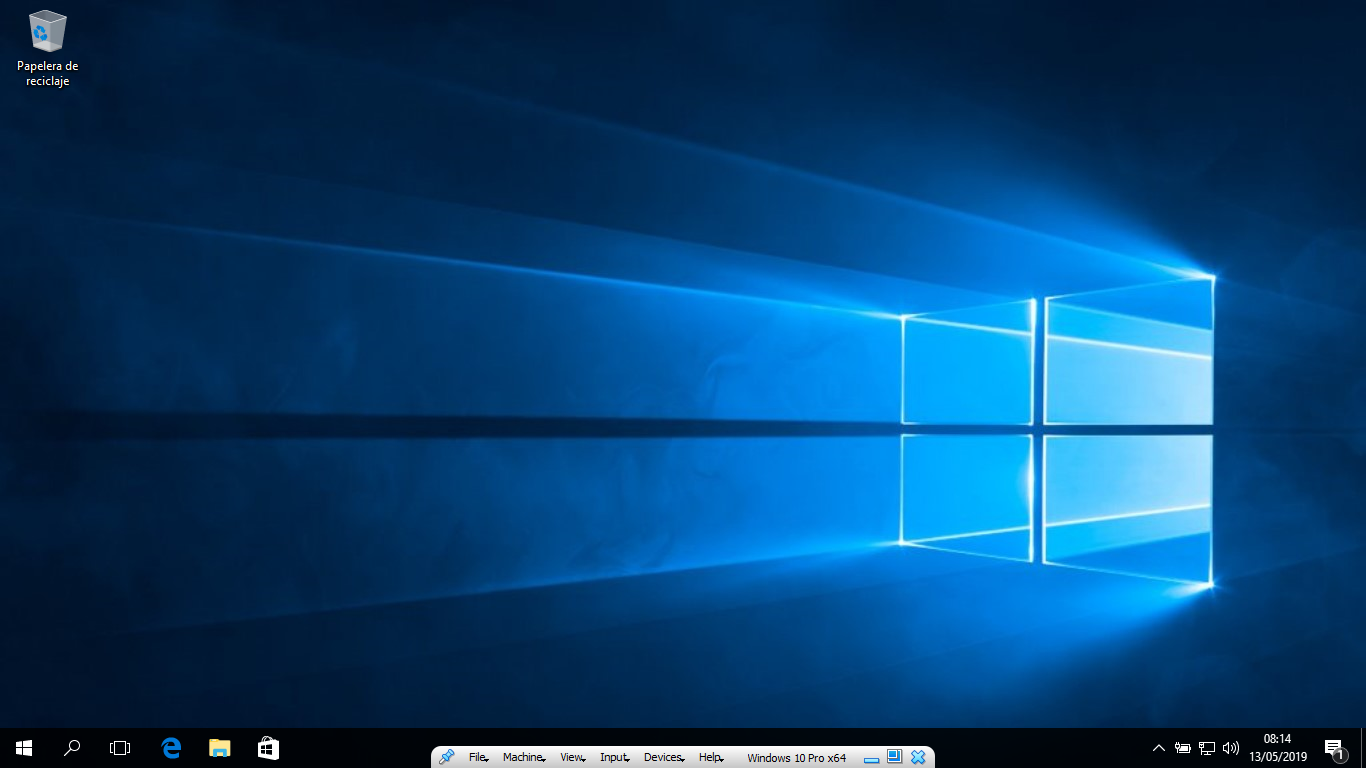
Once the installation process is finished, you will be prompted to restart the virtual machine. Following the restart, it will be feasible to use the VM in fullscreen mode with an improved resolution.

That’s it.